项目简介
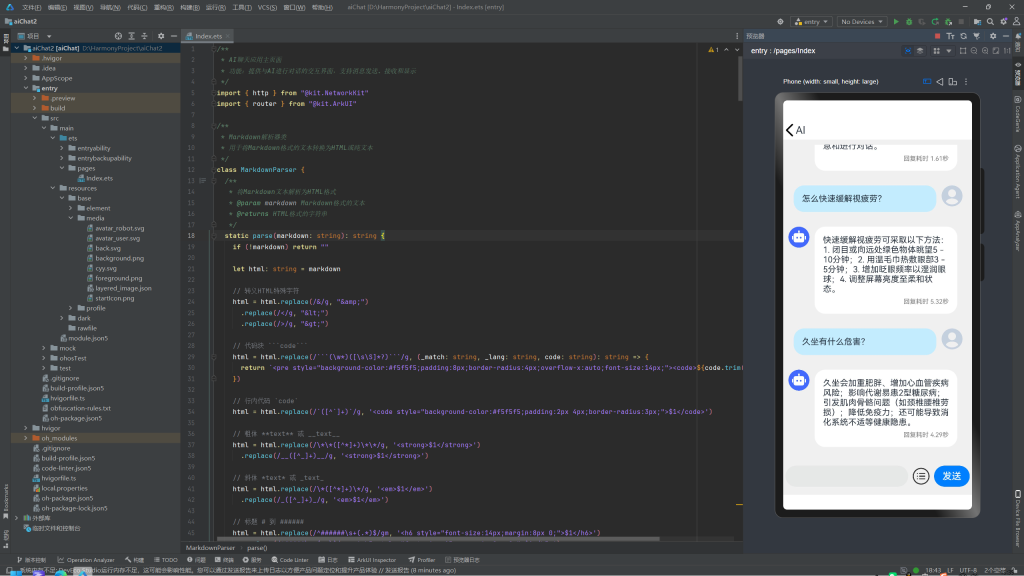
本项目是一个基于鸿蒙原生开发的AI聊天应用,通过调用本地部署的LM Studio大模型API,实现与AI的实时对话功能。项目展示了鸿蒙应用开发的核心要素,包括UI组件、网络请求、数据模型、权限管理等完整的技术栈。
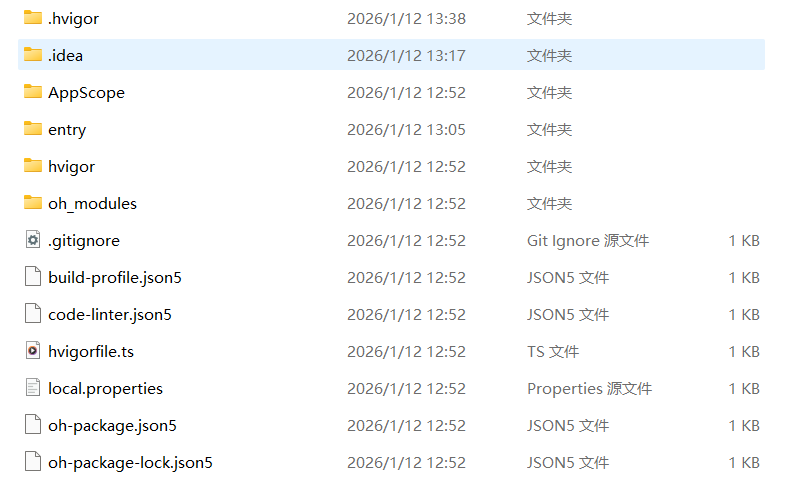
项目文件
环境准备
1. 开发工具要求
- DevEco Studio: 5.0.0及以上版本
- HarmonyOS API: 6.0.1(21)及以上
- Node.js: 用于构建工具链
2. LM Studio安装配置
2.1 安装LM Studio
访问 LM Studio官网 下载并安装最新版本。
2.2 加载模型
- 打开LM Studio应用
- 在搜索框中输入所需模型,本项目使用
zai-org/glm-4.6v-flash - 下载模型到本地
2.3 启动API服务
- 在LM Studio左侧菜单点击 “Chat”
- 选择加载的模型
- 点击顶部 “Start Server” 按钮启动本地API服务
- 确认服务运行在
http://127.0.0.1:1234/v1/chat/completions
3. 网络地址适配
根据不同的运行环境,需要调整API地址:
// 预览器环境
const API_URL = "http://127.0.0.1:1234/v1/chat/completions"

// 模拟器环境
const API_URL = "http://10.0.2.2:1234/v1/chat/completions"

// 真机环境(替换为开发机在同一局域网的IP)
const API_URL = "http://192.168.1.100:1234/v1/chat/completions"
项目结构说明
aiChat2/
├── AppScope/
│   └── app.json5                      # 应用级配置(包名、版本等)
├── entry/
│   ├── src/main/
│   │   ├── ets/
│   │   │   ├── pages/
│   │   │   │   └── Index.ets          # 主页面UI和核心逻辑
│   │   │   ├── entryability/
│   │   │   │   └── EntryAbility.ets   # 应用入口
│   │   │   └── entrybackupability/
│   │   │       └── EntryBackupAbility.ets
│   │   ├── module.json5               # 模块配置(权限、页面等)
│   │   └── resources/                 # 资源文件
│   │       ├── base/element/          # 字符串、颜色资源
│   │       ├── base/media/            # 图片、图标资源
│   │       └── rawfile/               # 原始文件
│   └── oh-package.json5               # 模块依赖
└── oh_modules/                        # 依赖模块
核心代码实现
1. 权限配置
在 entry/src/main/module.json5 中添加网络权限:
{
  "module": {
    "requestPermissions": [{
      "name": "ohos.permission.INTERNET",
      "usedScene": {
        "abilities": ["EntryAbility"],
        "when": "inuse"
      }
    }]
  }
}
2. 数据模型定义
聊天消息模型
@Observed
export class ChatMessages {
  sender: "我" | "AI"      // 发送者标识
  message: string          // 消息内容
  responseTime: string = ""  // 回复耗时

  constructor(sender: "我" | "AI", message: string) {
    this.sender = sender
    this.message = message
  }
}
API接口定义
// 请求消息接口
interface ChatMessage {
  role: string        // 角色:system/user/assistant
  content: string     // 消息内容
}

// 请求体接口
interface LMStudioRequest {
  model: string              // 模型名称
  messages: ChatMessage[]    // 消息列表
  temperature: number        // 温度参数(0-2)
}

// 响应消息接口
interface ResponseMessage {
  role: string
  content: string
}

// 响应选择项接口
interface Choice {
  message: ResponseMessage
}

// 响应体接口
interface LMStudioResponse {
  choices: Choice[]
}
3. 网络请求实现
HTTP请求封装
import { http } from "@kit.NetworkKit"

@Observed
export class GetMessage {
  /**
   * 接收用户输入并调用AI API获取回复
   * @param input 用户输入的消息内容
   * @returns AI的回复内容
   */
  async receive(input: string): Promise<string> {
    try {
      // 创建HTTP请求对象
      let request = http.createHttp()

      // 构建API请求体
      let requestBody: LMStudioRequest = {
        model: "zai-org/glm-4.6v-flash",
        messages: [
          {
            role: "system",
            content: "请直接回答用户的问题,不要输出思考过程,不要使用think标签,不要展示推理步骤。只提供最终答案。输出不超过100字"
          },
          { role: "user", content: input }
        ],
        temperature: 0.7
      }

      // 发送HTTP POST请求
      let result = await request.request(
        "http://127.0.0.1:1234/v1/chat/completions",
        {
          method: http.RequestMethod.POST,
          header: {
            "Content-Type": "application/json"
          },
          extraData: JSON.stringify(requestBody)
        }
      )

      // 检查响应状态码
      if (result.responseCode === 200) {
        let response: LMStudioResponse = JSON.parse(result.result.toString())
        let rawContent = response.choices[0].message.content
        // 过滤掉思考标签
        return this.filterThinkContent(rawContent)
      }

      return "请求失败,状态码: " + result.responseCode
    } catch (error) {
      console.error("HTTP request failed:", error)
      return "请求失败,请稍后重试"
    }
  }

  /**
   * 过滤AI回复中的思考过程标签
   */
  private filterThinkContent(content: string): string {
    let thinkStartTag = "think"
    let thinkEndTag = ""

    let startIndex = content.indexOf(thinkStartTag)
    if (startIndex === -1) return content.trim()

    let endIndex = content.indexOf(thinkEndTag, startIndex)
    if (endIndex === -1) return content.trim()

    // 移除think标签及其内容
    let filtered = content.substring(0, startIndex) + content.substring(endIndex + thinkEndTag.length)
    return filtered.trim()
  }
}

// 创建消息处理工具实例
let messageUtil = new GetMessage()
export default messageUtil
4. UI组件实现
主页面组件结构
@Entry
@Component
struct Index {
  @State isReceive: boolean = false          // 是否正在接收回复
  @State chatList: Array<ChatMessages> = []  // 聊天消息列表
  @State sendMessage: string = ""            // 待发送消息
  @State isPanelShow: boolean = false        // 是否显示常用语面板
  private scroller: Scroller = new Scroller()

  // 页面初始化
  aboutToAppear(): void {
    let chat = new ChatMessages("AI", "你好,我是AI!请问有什么可以帮您?")
    this.chatList.push(chat)
    setTimeout(() => {
      this.scroller.scrollEdge(Edge.Bottom)
    }, 100)
  }

  // 发送消息
  async SendMessage() {
    this.isReceive = true
    let userChat = new ChatMessages("我", this.sendMessage)
    this.chatList.push(userChat)
    this.sendMessage = ""
    this.scroller.scrollEdge(Edge.Bottom)

    let startTime = Date.now()
    let receiveMessage = await messageUtil.receive(userChat.message)
    let endTime = Date.now()
    let timeUsed = ((endTime - startTime) / 1000).toFixed(2)

    let RobotChat = new ChatMessages("AI", receiveMessage)
    RobotChat.responseTime = `回复耗时 ${timeUsed}秒`
    this.isReceive = false
    this.chatList.push(RobotChat)
    this.scroller.scrollEdge(Edge.Bottom)
  }

  build() {
    Stack() {
      Column() {
        // 顶部标题栏
        Row() {
          Image($r('app.media.back'))
            .height(24)
            .onClick(() => {
              router.back()
            })
          Text(this.isReceive ? "AI正在思考中..." : "AI")
            .fontSize(20)
        }
        .width('100%').height('5%')
        .backgroundColor(Color.White)

        // 聊天消息列表
        Column() {
          List({ scroller: this.scroller }) {
            ForEach(this.chatList, (chat: ChatMessages) => {
              ListItem() {
                // 消息渲染逻辑
                if (chat.sender === "AI") {
                  // AI消息样式
                  Row() {
                    Image($r('app.media.avatar_robot'))
                      .width(40).height(40).borderRadius(30)
                    Column() {
                      Text(MarkdownParser.toPlainText(chat.message))
                        .fontSize(16)
                      if (chat.responseTime) {
                        Text(chat.responseTime)
                          .fontSize(12).fontColor(Color.Gray)
                      }
                    }
                    .alignItems(HorizontalAlign.Start)
                    .backgroundColor(Color.White)
                    .padding(16).margin(10).borderRadius(20)
                  }
                } else {
                  // 用户消息样式
                  Row() {
                    Text(chat.message)
                      .fontSize(16)
                      .backgroundColor("#CCEBFF")
                      .padding(16).margin(10).borderRadius(20)
                    Image($r('app.media.avatar_user'))
                      .width(40).height(40).borderRadius(30)
                  }
                }
              }
            })
          }
          .scrollBar(BarState.Off)
        }
        .height("85%")

        // 底部输入栏
        Row() {
          TextInput({ text: this.sendMessage })
            .width("65%")
            .onChange((value: string) => {
              this.sendMessage = value
            })
          Image($r('app.media.cyy'))
            .width(32)
            .onClick(() => {
              this.isPanelShow = true
            })
          Button("发送")
            .onClick(async () => {
              this.SendMessage()
            })
        }
        .height("10%")
      }

      // 常用语面板
      Panel(this.isPanelShow) {
        Column() {
          Row() {
            Button("返回")
              .onClick(() => {
                this.isPanelShow = false
              })
            Text("常用语").fontSize(24)
            Blank()
          }
          // 常用语按钮
          this.usuallyTake("你好!你是谁?")
          this.usuallyTake("怎么快速缓解视疲劳?")
          this.usuallyTake("久坐有什么危害?")
        }
      }
    }
    .backgroundColor("#F0F0F0")
  }
}
5. Markdown解析器
class MarkdownParser {
/**
* 将Markdown文本解析为HTML格式
*/
static parse(markdown: string): string {
if (!markdown) return ""
let html: string = markdown
// 转义HTML特殊字符
html = html.replace(/&/g, "&")
.replace(/</g, "<")
.replace(/>/g, ">")
// 代码块 ```code```
html = html.replace(/```(\w*)([\s\S]*?)```/g,
(_match: string, _lang: string, code: string): string => {
return `<pre style="background-color:#f5f5f5;padding:8px;border-radius:4px;overflow-x:auto;"><code>${code.trim()}</code></pre>`
})
// 行内代码 `code`
html = html.replace(/`([^`]+)`/g,
'<code style="background-color:#f5f5f5;padding:2px 4px;border-radius:3px;">$1</code>')
// 粗体 **text** 或 __text__
html = html.replace(/\*\*([^*]+)\*\*/g, '<strong>$1</strong>')
.replace(/__([^_]+)__/g, '<strong>$1</strong>')
// 斜体 *text* 或 _text_
html = html.replace(/\*([^*]+)\*/g, '<em>$1</em>')
.replace(/_([^_]+)_/g, '<em>$1</em>')
// 标题 # 到 ######
html = html.replace(/^######\s+(.*)$/gm, '<h6 style="font-size:14px;margin:8px 0;">$1</h6>')
.replace(/^#####\s+(.*)$/gm, '<h5 style="font-size:15px;margin:8px 0;">$1</h5>')
.replace(/^####\s+(.*)$/gm, '<h4 style="font-size:16px;margin:8px 0;">$1</h4>')
.replace(/^###\s+(.*)$/gm, '<h3 style="font-size:17px;margin:8px 0;">$1</h3>')
.replace(/^##\s+(.*)$/gm, '<h2 style="font-size:18px;margin:8px 0;">$1</h2>')
.replace(/^#\s+(.*)$/gm, '<h1 style="font-size:20px;margin:8px 0;">$1</h1>')
// 链接 [text](url)
html = html.replace(/\[([^\]]+)\]\(([^)]+)\)/g, '<a href="$2" style="color:#007AFF;">$1</a>')
// 列表
html = html.replace(/^[\-\*]\s+(.*)$/gm, '<li style="margin-left:20px;font-size:16px;">$1</li>')
html = html.replace(/^\d+\.\s+(.*)$/gm, '<li style="margin-left:20px;font-size:16px;">$1</li>')
// 普通文本包裹
html = `<div style="font-size:16px;color:#000000;line-height:1.6;">${html}</div>`
return html
}
/**
* 将Markdown文本转换为纯文本(用于预览器显示)
*/
static toPlainText(markdown: string): string {
if (!markdown) return ""
let text: string = markdown
// 移除代码块
text = text.replace(/```[\s\S]*?```/g, '')
// 移除行内代码
text = text.replace(/`([^`]+)`/g, '$1')
// 移除粗体标记
text = text.replace(/\*\*([^*]+)\*\*/g, '$1')
text = text.replace(/__([^_]+)__/g, '$1')
// 移除斜体标记
text = text.replace(/\*([^*]+)\*/g, '$1')
text = text.replace(/_([^_]+)_/g, '$1')
// 移除标题标记
text = text.replace(/^#+\s+/gm, '')
// 移除链接标记
text = text.replace(/\[([^\]]+)\]\([^)]+\)/g, '$1')
// 清理多余换行
text = text.replace(/\n{3,}/g, '\n\n')
return text.trim()
}
}接口对接详解
1. API调用流程
用户输入消息
    ↓
构建请求体(包含system prompt和user message)
    ↓
发送HTTP POST请求到LM Studio API
    ↓
接收响应并解析JSON
    ↓
提取AI回复内容
    ↓
过滤思考标签
    ↓
显示在UI上
2. 请求参数说明
| 参数 | 类型 | 说明 | 示例值 |
|---|---|---|---|
| model | string | 模型名称 | “zai-org/glm-4.6v-flash” |
| messages | array | 消息列表 | [{role, content}] |
| temperature | number | 温度参数(0-2) | 0.7 |
3. 响应格式说明
{
  "choices": [
    {
      "message": {
        "role": "assistant",
        "content": "AI的回复内容"
      }
    }
  ]
}
4. System Prompt配置
通过设置system prompt可以控制AI的回复风格:
{
  role: "system",
  content: "请直接回答用户的问题,不要输出思考过程,不要使用think标签,不要展示推理步骤。只提供最终答案。输出不超过100字"
}
常见问题解决
1. 网络请求失败
问题: 请求失败,提示网络错误
解决方案:
- 确认LM Studio服务已启动
- 检查端口号是否正确(默认1234)
- 预览器使用
127.0.0.1 - 模拟器使用
10.0.2.2 - 真机使用局域网IP地址
2. 权限被拒绝
问题: 应用启动后无法请求网络
解决方案:
在 module.json5 中确保添加了网络权限:
{
  "requestPermissions": [{
    "name": "ohos.permission.INTERNET",
    "usedScene": {
      "abilities": ["EntryAbility"],
      "when": "inuse"
    }
  }]
}
3. 模型加载失败
问题: LM Studio无法加载模型
解决方案:
- 确保模型已完整下载
- 检查本地磁盘空间是否充足
- 尝试重新下载模型
- 查看LM Studio日志获取详细错误信息
4. 回复包含思考标签
问题: AI回复包含 <think> 标签内容
解决方案:
使用 filterThinkContent 方法过滤思考标签:
private filterThinkContent(content: string): string {
  let thinkStartTag = "think"
  let thinkEndTag = ""
  let startIndex = content.indexOf(thinkStartTag)
  if (startIndex === -1) return content.trim()
  let endIndex = content.indexOf(thinkEndTag, startIndex)
  if (endIndex === -1) return content.trim()
  let filtered = content.substring(0, startIndex) + content.substring(endIndex + thinkEndTag.length)
  return filtered.trim()
}
5. Markdown显示不正确
问题: 代码块或格式显示异常
解决方案:
- 在真机上使用
RichText组件显示HTML - 在预览器上使用
MarkdownParser.toPlainText()转换为纯文本 - 本项目为了兼容预览器,统一使用纯文本显示
项目特色功能
1. 响应时间统计
自动计算并显示AI回复耗时,便于性能监控。
2. 常用语快速回复
预置常用语,点击即可快速发送。
3. 思考过程过滤
自动过滤AI回复中的思考标签,只保留最终答案。
4. Markdown支持
支持Markdown格式渲染,包括代码块、粗体、斜体、标题等。
5. 多环境适配
支持预览器、模拟器、真机三种运行环境的网络地址自动适配。
技术栈总结
- UI框架: ArkUI 声明式UI
- 网络请求: @kit.NetworkKit (http模块)
- 路由导航: @kit.ArkUI (router模块)
- 状态管理: @State 装饰器
- 数据模型: @Observed 装饰器
- 权限管理: module.json5 配置
扩展建议
1. 功能扩展
- 添加会话历史记录持久化
- 支持多模型切换
- 添加流式输出支持
- 实现多轮对话上下文管理
- 添加语音输入功能
2. 性能优化
- 实现请求缓存机制
- 添加请求队列管理
- 优化长文本渲染性能
- 实现消息分页加载
3. 用户体验优化
- 添加加载动画效果
- 实现消息长按操作(复制、删除)
- 支持自定义主题
- 添加震动反馈
总结
本项目完整展示了鸿蒙应用调用本地大模型API的开发流程,涵盖了从环境搭建、权限配置、网络请求到UI交互的全过程。通过LM Studio本地部署大模型,可以实现低延迟、高隐私的AI对话功能,为开发者提供了一个完整的参考实现。
项目的核心价值在于:
- 零成本部署: 使用本地模型,无需API密钥和付费服务
- 低延迟响应: 本地调用,响应速度快
- 数据隐私: 数据不经过第三方服务器,更加安全
- 完整示例: 提供了从后端调用到前端展示的完整实现
希望本教程能帮助开发者快速上手鸿蒙AI应用开发!
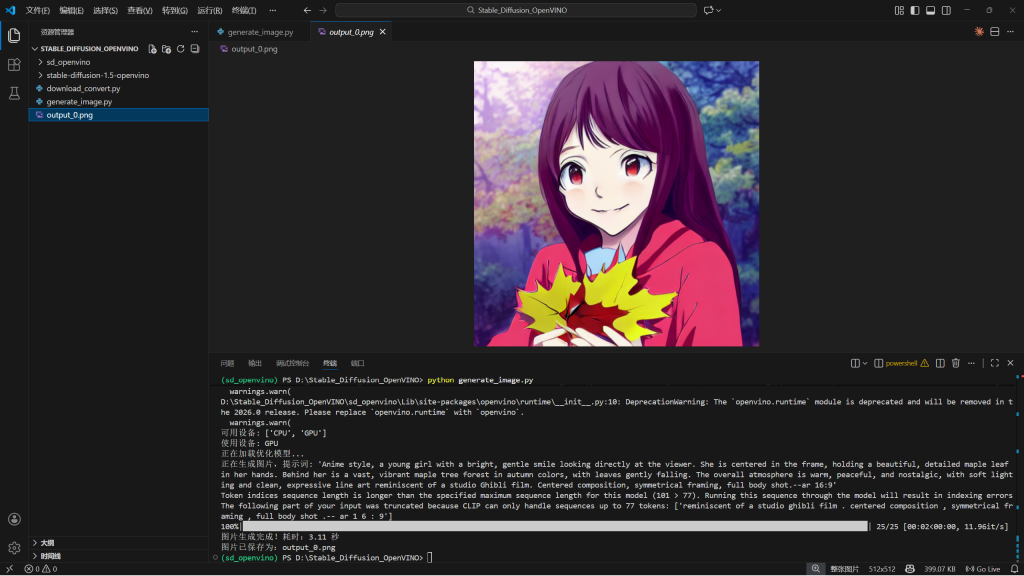
前来看看
嘻嘻